Revising Leah

January 25, 2009

Publishing Through Lulu: The ISBN Barcode

A year ago, when I first published The Spring through Lulu, I remember that the most difficult and confusing part of the process was generating the ISBN barcode for the back cover of my book.

You would think that there would be a website online in which all you have to do is type in your ISBN number and a program would generate a free, high quality barcode image for you to download and use — all in one easy step. There are sites online that can do this, but they aren’t always free. (Perhaps the best option would be for Lulu itself to offer such a service.)

Instead, Lulu directs you to this site, which will generate a barcode for you for free in either .jpg format or .eps format. You don’t want to try to use the .jpg format because the quality of the image isn’t very high, and you need a high quality image for the barcode. The .eps file is what you want, but the trouble is none of my image editing tools on my computer could open up an .eps file.

So what you have to do is download a separate program which will allow you to view and convert the .eps file to another format. A free program, called GSview, is the recommended program (you also need to make sure you have GhostScript installed). It’s available for Windows, Mac, and Linux users. Once that program is installed, you can then open the .eps file and convert it to a .png or some other high quality format which you can then edit in another program. (At the very least, you’ll need to crop the image. The barcode image has a lot of white space around it.)

It sounds simple, and I suppose that it is, but I remember last year it took me days to figure out this process. When The Spring was finally published, I knew I’d be re-publishing Leah this year, so I made sure to save the GSview program on my hard drive. A couple weeks ago, when the time came to generate a barcode for the new novel’s cover, it was a very easy process.

January 1, 2009

Publishing Through Lulu: Uploading

Well, today is the day. At long last I get the publishing process for Leah rolling. Here’s a review of the steps I took (with screenshots!).

1. Sign In

I already have a Lulu account, of course, so I logged in and started a new project. I clicked the “Publish” tab, then clicked “Paperback books”, and then “Get Started”.

2. Start Tab

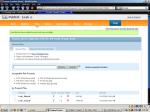
Here, I simply provided the title and author’s name. I also selected the “Make It Public” option because I want to be able to offer the book to readers later on. Clicked Save & Continue.

(Click For Larger Image)

(Click For Larger Image)

3. Options Tab

Next, I had to determine what kind of format I wanted my book to take. I chose the usual options for a novel: Standard paper (not Publisher Grade); book size: US Trade; perfect binding; and black & white color.

Choose the Physical Properties of Your Book

Choose the Physical Properties of Your Book

4. Files Tab

Now we upload, and this is where the preparations that I described in my earlier posts (here and here) paid off. I upload two of the three PDF documents that I had prepared: the manuscript and the title/copyright page. Once they’re uploaded, I arranged the files in the right order (the title page document goes first), and then Lulu automatically merged the two documents together and allowed me the chance to review that merged file.

Upload Files

Upload Files

5. Cover Tab

The next step takes care of the other PDF file that I had prepared: the one with the cover of the book. If you haven’t designed a cover or don’t care about the cover design (although you should) this is the stage where Lulu can assist in creating a generic cover. I’ve designed my own cover, though, so I clicked on the “Upload One-Piece Cover” button and uploaded my document.

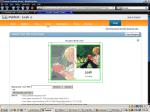
Pay No Attention to That Green Fringe

Pay No Attention To That Green Fringe

A year ago, when I was publishing The Spring, this screen confused me. I knew that I was supposed to create a “bleed” zone around my cover, which I did. But the weird green border that you see in the image above confused me and made me second guess what I had done. I actually went back and tinkered with the size of the cover, which proved to be a mistake when my proof copy arrived and I saw that I had made the border around the cover image too large. This time, I played it cool and just clicked “Save & Continue”. If there is a problem when I get the proof copy, then I’ll make adjustments later, but I think the cover is going to turn out fine.

6. Description Tab

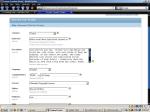
Here, I filled in the basic info for the content of the book. All of the fields were filled in except for the ISBN number because at this stage in the process, I hadn’t been assigned a number yet. As you can see, I placed the novel in the “Teens” category as opposed to the “Fiction & Literature” category (I would have preferred to place it in both). I’m not sure if that was the right thing to do, but I can change it later if I need to.

Everything But the ISBN

Everything But the ISBN

7. Price Tab

I hope you like to wrestle, because this is one of those screens which will resist everything you try to do. You can see in the screenshot that there are two open fields in the “Retail Print” section. Don’t try to enter anything in the “Price” field — only tinker with the “My Revenue” field and let the values that you insert there adjust the “Price” field for you.

Just Adjust the My Revenue Box

Just Adjust the My Revenue Box

I wanted to make sure that I set the price for Leah to be less than the price I set for The Spring, just because Leah is a bit shorter than The Spring. You can see in the screenshot that the author’s cut of the money, especially when selling through retailers like Amazon, is very small. (This is where Lulu authors get greedy and why some 200-page novels published through Lulu cost upwards of $30.) Whether publishing the old-fashioned way or through POD, the sad fact is that authors just don’t earn much from each individual sale. It’s a good thing that creative writing isn’t my day job!

And I will, of course, make the novel available as a free download.

8. Review and Order

After that, I am asked to review everything, make sure it’s OK, and then I order a proof copy. I do have to pay for a proof copy, but since I’m the author of the project, I don’t have to pay the full price that I set for the novel back in the Price Tab. Instead, I only pay for the for the cost of manufacturing a copy and shipping it to me. I added my book to my virtual shopping cart, but I didn’t check out just yet because I still have one more thing to do.

9. “Purchase” a Distribution Package

“Purchase” is in quotation marks because I didn’t actually have to purchase anything here. If you publish your novel through Lulu (as opposed to choosing the “Published by You” option) you don’t have to pay anything. This is apparently a new development for Lulu because I remember a year ago, when I published The Spring, I did have to pay about $100 for the distribution package.

The most important part of the package is the assignment of an ISBN number. You need this if you want to sell your book either online or in a bookstore. If I could change one thing about Lulu’s publishing process it would be that I would like to get my ISBN number before I uploaded the PDF files for the Title/Copyright document and the book cover so that the proof copy that I ordered would be sent to me complete. Instead, I’ll have to add the ISBN number to the copyright page and insert the ISBN bar code to my cover after I’ve reviewed the proof copy. Perhaps Lulu wants to make sure that authors take that step of reviewing the proof copy before approving the book for publication and making it available to everyone.

The whole process took about 90 minutes to complete. That’s perhaps longer than usual since I was taking screenshots of my progress and writing notes in WordPress.

So now I wait for the proof copy of my book to be manufactured and sent to me. That, unfortunately, will probably take at least a week.

Questions? Comments?

December 28, 2008

Publishing Through Lulu: Preparations, Part 2

When publishing a book through Lulu.com, you need to come prepared with three documents. In my last post, I discussed one of these: the manuscript of your novel. In this post, I’ll discuss the other two documents: the title/copyright page and the book cover.

Title/Copyright

The title/copyright document can be made with the same programs you used for the manuscript itself. I’m not sure why Lulu wants this document and the manuscript uploaded separately since they’ll both be joined together anyway. Perhaps it prevents problems with the page numbering, although it is certainly possible, using page breaks, to prevent page numbers from appearing before the first page of text.

Anyway, in this document, you’ll have — at least — a title page and a copyright page. There are other things you can include here, too, such as a table of contents, acknowledgments and dedications, an inner title page — whatever you want. All of these pages will count towards the total page count that you’ll use to determine the size of the book cover and the price of the book.

On the copyright page, you have the usual stuff that you find in any book: title and author, date and place of publication, ISBN number, etc. I have flirted with the idea of applying the Creative Commons license to my work. Since I don’t mind offering my novels for free, perhaps this would be the best way to go. I haven’t had the guts to take the plunge, though. For now, I continue to use a standard copyright.

Book Cover

Like most POD websites, Lulu offers a selection of generic book covers from which to choose, but if you want your book to stand out, you’ll probably want to try designing your own. I’m certainly not an expert graphic designer, but even with my basic skills, I’ve been able to design nice, simple book covers. As with everything else with self-publishing, I find it creatively satisfying do design my own cover. And at least I know I’m going to get a cover I like, as opposed to a cover I don’t like.

Where do you find the imagery? If you’re a talented photographer or artist, perhaps you could use your own work. If you are artistically challenged, like me, the Internet has a wealth of options. There are plenty of stock photo websites where you can purchase images for reasonable prices. Sites like Flickr are options too if you want something really unique, but of course you’ll have to contact and obtain permission from the photographer before you use those images, since most are copyrighted.

If you don’t have the skills to put together something really fantastic, or if your design idea exceeds your ability, you could also hire a professional graphic designer. My book covers are somewhat minimalist, in part because that’s all I’m capable of creating, but also because I don’t want the covers to be too busy. Since I designed the cover for The Spring over a year ago, I’ve paid a lot more attention to book cover designs. Obviously, there are a lot of professionally designed covers that put mine to shame, but I dare say that even my basic design looks better than some covers out there. Again, it’s all a subjective thing. I think my designs are simple and clean, and that’s the look I’m going for.

When designing the size of the cover, you have to be very precise, keeping in mind such things as the bleed around the edges and the width of the spine. Lulu even has a handy spine width calculator to help you out. One important item that you might not be able to add to the cover until later in the process is the ISBN bar code. I’ll discuss that tricky thing in a separate blog post next month.

Like the formatting of the manuscript, designing the book cover will take some time. Be patient, be careful, and be precise. Remember, you want your book to be the best it can be.

Preparations Complete

It’s best to have these three documents complete and ready to go as PDF files before logging in to Lulu to start the publication process. If you have these files ready, then the uploading process should go very smoothly.

My own files for Leah are ready to go. I’m just waiting for the new year to log in to Lulu and get the process rolling. My next post in this topic, then, will be on January 1.

December 26, 2008

Publishing Through Lulu: Preparations, Part 1

In this final series of posts for Revising Leah, I’m going to document and comment upon how I am publishing my novel through Lulu. If you’ve ever wondered whether self-publishing is right for you, I hope you’ll follow along and learn out what it’s all about.

Lulu.com, and services like it, have become a force for the democratization of publishing. Now, anyone with a story to tell can publish one’s work. With this freedom, however, comes great responsibility. While it’s true that publishing through Lulu is easy and relatively inexpensive, if you want to do it right — if you want to produce a book that you can be proud of, that will sell — then there is a lot of work that you must do.

Revise and Edit! (Have you learned nothing from this blog?)

Obviously, the most important preparation involves carefully revising, editing, and proofreading your text so that you don’t give your readers the impression that you are barely literate. Even if the book you publish is for your eyes only, you don’t want it to be littered with errors and passages that you wish you had revised. If you do want your book to be read by others, then certainly you want it to look as professional as possible. If this means “beta testing” your manuscript with other readers or hiring an editor, then do it. Moriah Jovan had a nice rant on this subject over at Publishing Renaissance recently.

I’ve been working on my novel since April (and, of course, I have documented that process in this blog). My manuscript has reached a point where I am satisfied with it. I’m able to read through a chapter without seeing anything that needs to be changed or corrected. When I receive the galley proofs next month, I’ll probably find a few last minute errors that I ought to fix, but for now, I feel like the book is ready to go.

Formatting

So once the manuscript is the best it can be, it’s ready to be formatted. This may not sound like a big deal, but this is a step that you can expect will take a few days, at least.

The first step: page size and orientation. Lulu allows for several different possibilities for the size of a book, but the usual size for a novel published through Lulu is 9″x6″ — that’s a little bit larger than most novels published, but it’s not freakishly large or anything; it’s still easy to carry and hold in your hands and read.

You’ll need to format the pages so that they mirror each other. In other words, you have to imagine that page 1 of the novel will be on the right, page 2 on the left, page 3 on the right, etc. This can easily be set up within your word processor, usually in the same dialogue box that you used to set up the size of the page.

Lulu has specific requirements for the size of the margins. Basically, you’re setting up a half inch all around except for the inner margin (where the pages join at the book’s spine) which is a 3/4 inch margin.

Pretty easy so far? Well, now things get interesting. The next choice you have to make is the font style and size. Unless you are doing something wacky, you’ll probably want to stick to a size 12 or 13 font. The font style is up to you, though. Lulu has a list of font styles that they prefer you use, but it is possible to use others. I like to use Garamond because I think it looks really nice when the book is printed, but this is a subjective choice. There will be a lot more of these kinds of subjective choices as the process goes on. It can seem a little overwhelming, but this is what I like about self-publishing: the opportunity to direct all of the little details of the publishing process. I find it very satisfying. Satisfying, ultimately, but not always easy. . .

The Ninth Circle of Formatting Hell: Page Numbers

Nothing will frustrate you more than wrestling with the page numbers. Although I like to use OpenOffice for most of my word processing needs, the biggest beef that I have with the program is that it makes formatting up page numbers very, very difficult. In Microsoft’s Word, the process isĀ  much more simpler — in fact, it is so much easier that when I need to insert page numbers I often just open the file in Word, do my business there, and save it.

Depending on where you want the page numbers to go (top or bottom of the page), you might need to format breaks between the chapters. (I found this page online which helped explain how to do this in Word.) The purpose of creating a break between chapters is that it allows you to format the page numbers so that, if you choose, the page number won’t appear on the first page of the chapter. Depending on what the first page of each chapter looks like, you might not want the page number in the same place as the other numbers on the other pages. For example, if all of the page numbers for the rest of the text are in the top corners, maybe you want the page number on the first page of each chapter at the bottom of the page. Personally, I prefer not to include the page number on the first page of each chapter, but that’s just me. Whatever you decide to do, establishing formatting breaks between chapters makes this process easier.

At the same time that you are setting up the page numbers, you have to make a decision about whether you want your name and/or the title of your novel at the top of each page. And here is where you can literally do whatever you want. When I was setting up my page numbers, I sought inspiration and guidance by browsing through a dozen different books by as many different publishers. Almost every book had set up its page numbers and top margin material differently. Some put the numbers near the outer margin, some put them near the inner margin. Some books put the page number at the top of the page, others put the numbers on the bottom. Some books only used the title of the book, others used only the author’s name, others used the chapter title, others had a combination of some of these. Some books centered the material, others placed it near the page numbers. Apparently the only rule with page numbers and margin material is that there are no rules. You can do whatever you want.

So this has been a glimpse at some of the work you have to do when preparing the manuscript for Lulu’s publishing process. I thought you might want an example of what I’ve done, so take a look at this file:

Chapter One

It’s the first chapter of my novel, formatted more or less the way it will look when it is published. Look at my font, my spacing, the page numbers and headings, the first page of the chapter, etc. Again, you don’t have to format your manuscript exactly as I have formatted mine, but hopefully it will reinforce the idea that your text should look clean, neat, and organized — in other words, professional.

Next time: Preparing the title page and the book cover.
Create a free website or blog at WordPress.com.